Sunday, August 31, 2008

Daring Bakers Challenge #10

Why I am a Daring Baker

I've been thinking lately about this so, I thought I'd share. I am a daring Baker for a few different reasons. Allow me to elaborate.

~The first and most obvious reason is that I love to bake. It’s in my blood. Really. I love to see puff pastry come together and magically transform in the oven. I love to know why you can make truffles with heavy cream and not whole milk. I love making cakes a myriad of different ways. I love how the same cookies can be wafer thin or puffy and chewy just by tweaking the ingredient amounts. I love baking seasonally. There’s nothing like a light, fluffy lemon cake in spring or dense gingersnaps in late fall. But I digress.

~I’d be baking something anyway. The only difference is that I take pictures of the challenges as I go along.

~My husband loves for me to try out new recipes on him. He especially love this month's pastry cream.

~Our family schedule (with fellowship meals, 2 Bible studies a month, and not to mention our household hospitality) allows me to be baking regularly, and the Daring Bakers give me the opportunity to make something out of the ordinary and out of the box. Also this is a wonderful opportunity to bless others and not have temptation for our waistlines sitting out on the counter.

~My kids love to help me in the kitchen. They love to stir and watch things bake through the oven window, and of course they love to taste. The 2 older ones follow me into the kitchen and ask with grins on their faces, “What are we making today, Mom?”

~I want to become a better baker. The Daring Bakers challenges you to use new techniques and new ingredients every month. Also, seeing what the other bakers do with the same recipe is motivation to be original.

~It gives me the opportunity to bake something that I’ve always wanted to do. Like the Buche de Noel. Or this month’s eclairs. I’m still waiting for the croquembuche, though.


So, without further ado, I give you the August Challenge:


Pierre Hermé’s Chocolate Éclairs
Recipe from Chocolate Desserts by Pierre Hermé
(makes 20-24 Éclairs)

• Cream Puff Dough (see below for recipe), fresh and still warm

1) Preheat your oven to 375 degrees F (190 degrees C). Divide the oven into thirds by
positioning the racks in the upper and lower half of the oven. Line two baking sheets with
waxed or parchment paper.
2) Fill a large pastry bag fitted with a 2/3 (2cm) plain tip nozzle with the warm cream puff dough.
Pipe the dough onto the baking sheets in long, 4 to 41/2 inches (about 11 cm) chubby fingers.
Leave about 2 inches (5 cm) space in between each dough strip to allow them room to puff.
The dough should give you enough to pipe 20-24 éclairs.
3) Slide both the baking sheets into the oven and bake for 7 minutes. After the 7 minutes, slip the
handle of a wooden spoon into the door to keep in ajar. When the éclairs have been in the
oven for a total of 12 minutes, rotate the sheets top to bottom and front to back. Continue
baking for a further 8 minutes or until the éclairs are puffed, golden and firm. The total baking
time should be approximately 20 minutes.
Notes:
1) The éclairs can be kept in a cool, dry place for several hours before filling.

Assembling the éclairs:
• Chocolate glaze (see below for recipe)
• Chocolate pastry cream (see below for recipe)
1) Slice the éclairs horizontally, using a serrated knife and a gently sawing motion. Set aside the
bottoms and place the tops on a rack over a piece of parchment paper.
2) The glaze should be barely warm to the touch (between 95 – 104 degrees F or 35 – 40
degrees C, as measured on an instant read thermometer). Spread the glaze over the tops of
the éclairs using a metal icing spatula. Allow the tops to set and in the meantime fill the
bottoms with the pastry cream.
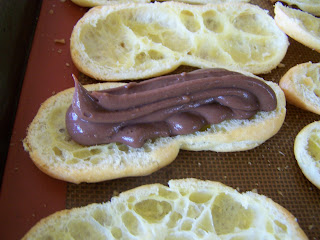
3) Pipe or spoon the pastry cream into the bottoms of the éclairs. Make sure you fill the bottoms
with enough cream to mound above the pastry. Place the glazed tops onto the pastry cream
and wriggle gently to settle them.

Notes:
1) If you have chilled your chocolate glaze, reheat by placing it in a bowl over simmering water,
stirring it gently with a wooden spoon. Do not stir too vigorously as you do not want to create
bubbles.
2) The éclairs should be served as soon as they have been filled.


3) Transfer the dough into a bowl of a mixer fitted with the paddle attachment, or using your
handmixer or if you still have the energy, continue by hand. Add the eggs one at a time,
beating after each egg has been added to incorporate it into the dough.
You will notice that after you have added the first egg, the dough will separate, once again do
not worry. As you keep working the dough, it will come back all together again by the time you
have added the third egg. In the end the dough should be thick and shiny and when lifted it
should fall back into the bowl in a ribbon.

4) The dough should be still warm. It is now ready to be used for the éclairs as directed above.

Notes:
1) Once the dough is made you need to shape it immediately.

2) You can pipe the dough and the freeze it. Simply pipe the dough onto parchment-lined baking
sheets and slide the sheets into the freezer. Once the dough is completely frozen, transfer the
piped shapes into freezer bags. They can be kept in the freezer for up to a month.


Chocolate Pastry Cream
Recipe from Chocolate Desserts by PierreHermé

• 2 cups (500g) whole milk
• 4 large egg yolks
• 6 tbsp (75g) sugar
• 3 tablespoons cornstarch, sifted
• 7 oz (200g) bittersweet chocolate, preferably Velrhona Guanaja, melted
• 2½ tbsp (1¼ oz: 40g) unsalted butter, at room temperature

1) In a small saucepan, bring the milk to a boil. In the meantime, combine the yolks, sugar and cornstarch together and whisk in a heavy‐bottomed saucepan.
2) Once the milk has reached a boil, temper the yolks by whisking a couple spoonfuls of the hot milk into the yolk mixture.Continue whisking and slowly pour the rest of the milk into the tempered yolk mixture.
3) Strain the mixture back into the saucepan to remove any egg that may have scrambled. Place the pan over medium heat and whisk vigorously (without stop) until the mixture returns to a boil. Keep whisking vigorously for 1 to 2 more minutes (still over medium heat).Stir in the melted chocolate and then remove the pan from the heat.
4) Scrape the pastry cream into a small bowl and set it in an ice‐water bath to stop the cooking process. Make sure to continue stirring the mixture at this point so that it remains smooth.


5) Once the cream has reached a temperature of 140 F remove from the ice‐water bath and stir in the butter in three or four installments. Return the cream to the ice‐water bath to continue cooling, stirring occasionally, until it has completely cooled. The cream is now ready to use or store in the fridge.

Notes:
1) The pastry cream can be made 2‐3 days in advance and stored in the refrigerator.
2) In order to avoid a skin forming on the pastry cream, cover with plastic wrap pressed onto the cream.
3) Tempering the eggs raises the temperature of the eggs slowly so that they do not scramble.

I had to whisk really hard at this point, I also loosened the cream with some more milk.

Gorgeous, gorgeous, gorgeous! I love this pastry cream and I will use this recipe again.

Chocolate Sauce
Recipe from Chocolate Desserts by Pierre Hermé
(makes 1½ cups or 525 g)

• 4½ oz (130 g) bittersweet chocolate, finely chopped
• 1 cup (250 g) water
• ½ cup (125 g) crème fraîche, or heavy cream
• 1/3 cup (70 g) sugar

1) Place all the ingredients into a heavy‐bottomed saucepan and bring to a boil, making sure to stir constantly. Then reduce the heat to low and continue stirring with a wooden spoon until the sauce thickens.
2) It may take 10‐15 minutes for the sauce to thicken, but you will know when it is done when it coats the back of your spoon.
Notes:
1) You can make this sauce ahead of time and store it in the refrigerator for two weeks. Reheat the sauce in a microwave oven or a double boiler before using.
2) This sauce is also great for cakes, ice-cream and tarts


Chocolate Glaze
Recipe from Chocolate Desserts by Pierre Hermé
(makes 1 cup or 300g)

• 1/3 cup (80g) heavy cream
• 3½ oz (100g) bittersweet chocolate, finely chopped
• 4 tsp (20 g) unsalted butter, cut into 4 pieces, at room temperature
• 7 tbsp (110 g) Chocolate Sauce (recipe below), warm or at room temperature

1)In a small saucepan, bring the heavy cream to a boil. Remove from the heat and slowly begin to add the chocolate, stirring with a wooden spoon or spatula.
2) Stirring gently, stir in the butter, piece by piece followed by the chocolate sauce.
Notes:
1) If the chocolate glaze is too cool (i.e. not liquid enough) you may heat it briefly
 in the microwave or over a double boiler. A double boiler is basically a bowl sitting over (not touching) simmering water.
2) It is best to glaze the eclairs after the glaze is made, but if you are pressed for time, you can make the glaze a couple days ahead of time, store it in the fridge and bring it up to the proper temperature (95 to 104 F) when ready to glaze.



Wednesday, August 27, 2008

Vacation Favorites

I thought I'd show a few of our favorite pictures from our vacation while I'm uploading them to be printed. I took a record number of pictures this vacation~ maybe later I'll show some of the amazing ancestry photos I copied while I was there...


Tuesday, August 26, 2008

Great Flood of '08

Did I fool you? We've been on our long awaited vacation for the last few weeks. Our trip to the south was wonderful and it flew by, as fun times usually do. On the other hand, it is so good to be home and to have the kids (and ourselves) in our own beds. I have a mountain of laundry (clean, and finally folded) upstairs ready to be distributed to the appropriate drawers and closets.

We arrived home in the late evening last Saturday to our happy home and noticed that the lawn looked quite nice~ we had heard that our area got good rain in the last few weeks. The next morning, on the way out the door headed towards church, Tim went downstairs to turn on the outside water for the sprinklers and I heard those dreaded words.

"Mandie, I think we have a problem."

The carpet section closest to the sump pump was very wet and the sump well was filled to the brim. We overrode the sump sensor, which obviously wasn't working, and manually turned on the pump. Out the side of the house spewed probably over a hundred gallons of water. Since we only saw water on one side of the basement and we were already late for church, we decided to tackle the problem later.

So, later, after church and dinner and the kids were in bed, Tim and I went down to the depths to remove the wet carpet. We got the carpet a few months after we moved into our home after we saw an advertisement on Freecycle. Someone was getting rid of carpet in good condition and we were looking for free carpet, so God was very gracious to us in supplying such a nice addition to the cold hard basement concrete. The people we got it from even gave us carpet padding and everything. I went to grab a soda from the other end of the basement, which we thought was dry, and discovered that it was wet also. All of the basement carpet. All of the carpet pad. The carpet under the pantry shelves. The carpet under my craft table. The carpet under the bookshelves that hold our homeschooling books. The carpet under the craft shelves. All of the basement carpet. At that point my eyes grew really wide and I started mumbling to myself "It'll be ok. It was only free carpet. It was ugly carpet anyway. Don't panic! Our things will dry!" Only as we scrambled to remove everything off the carpet (which was pretty much everything in the basement)I realized how good God's mercy was to us. There was hardly anything not waterproof sitting directly on the carpet! I had all of the pantry items except one 10lb bag of sugar on the shelves or on top of Rubbermaid boxes. I had all of my scrapbook supplies and pictures on the craft shelves or on my work table. All of the books were off the floor and on the shelves. All my yards and yards of fabric were safely tucked in their plastic see-through boxes. Remember how I've did all that work trying to organize the basement? Praise God for His excellent providence!

Yes, that was a long night for Tim and me. We did have to rip up all of the soggy carpet and the wet sponge-like carpet pad. That was a lot of work and our backs are still aching. As we ripped up the carpet, we had to sweep and squeegie the water to the big sump drain in the corner of the basement. As I type this now, our household fans are drying out the concrete. The basement contents are in a state of total upheaval until the concrete dries completely, but how amazing that the only real loss in the flood was a 10 lb bag of sugar!

Monday, August 25, 2008

Not a pumpkin!


(Morning Glory)

Wednesday, August 20, 2008

Bathroom Hooks

I needed a solution for all the lovely hooded towels that my kids love so much and I saw these great cast iron hooks one day at Hobby Lobby and I really like the result.

Sunday, August 17, 2008

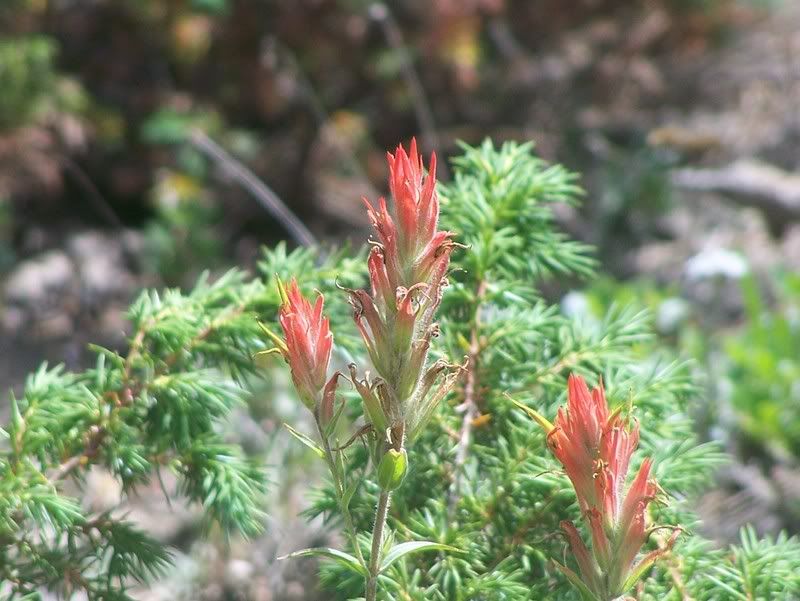
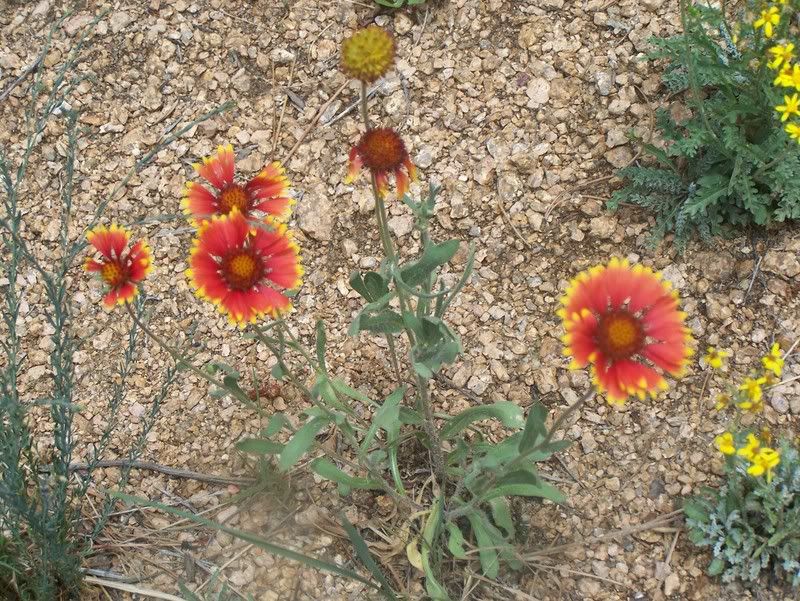
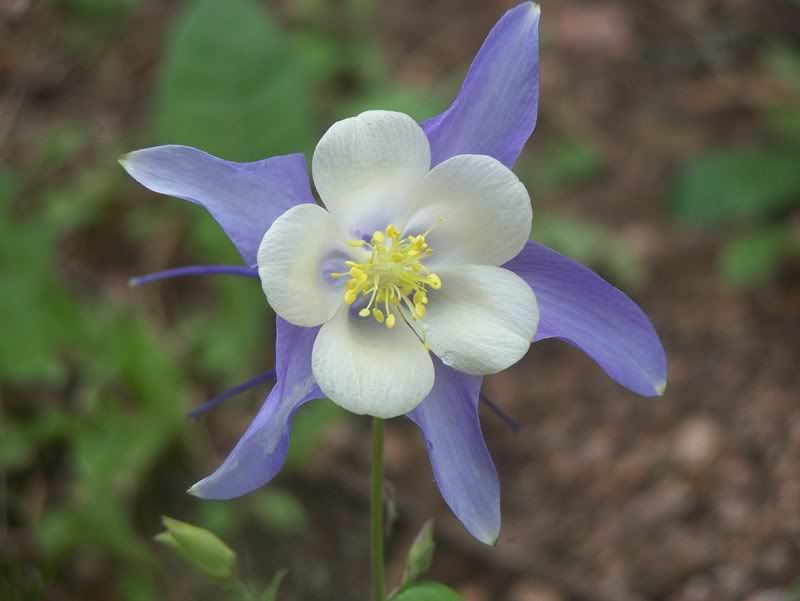
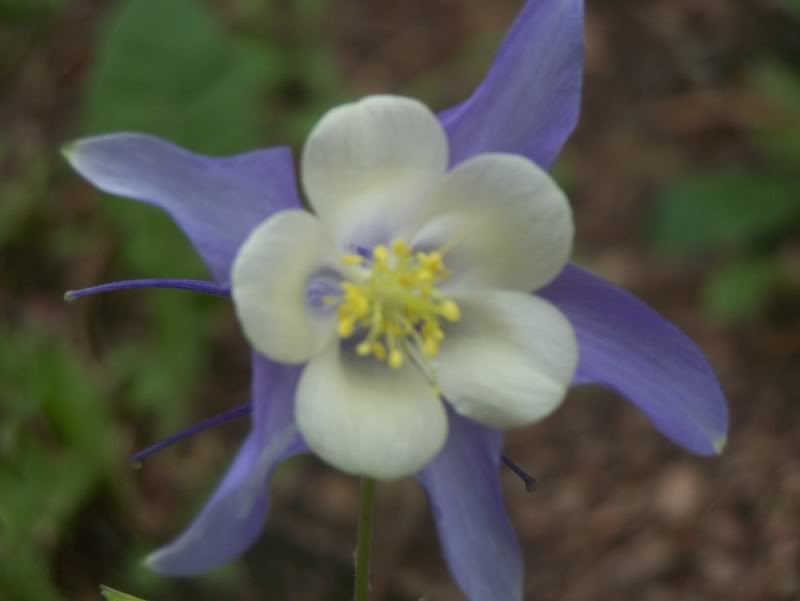
Teller County Flowers

Indian Paintbrush


What beautiful colors!


Columbine, our state flower. But you probably knew that.


Lovely Black Eyed Susans

Friday, August 15, 2008

Monday, August 11, 2008

Slow Growing Season

After last year's garden sort of bombed, I wasn't so excited about planting this year. I really need to find a system that works~ whether it's small established plants to put in the beds or starting from seed. If anyone has advice for the high-altitude, sandy/clay gardens, please let me know.

Baby lime buds. Grow babies, grow!


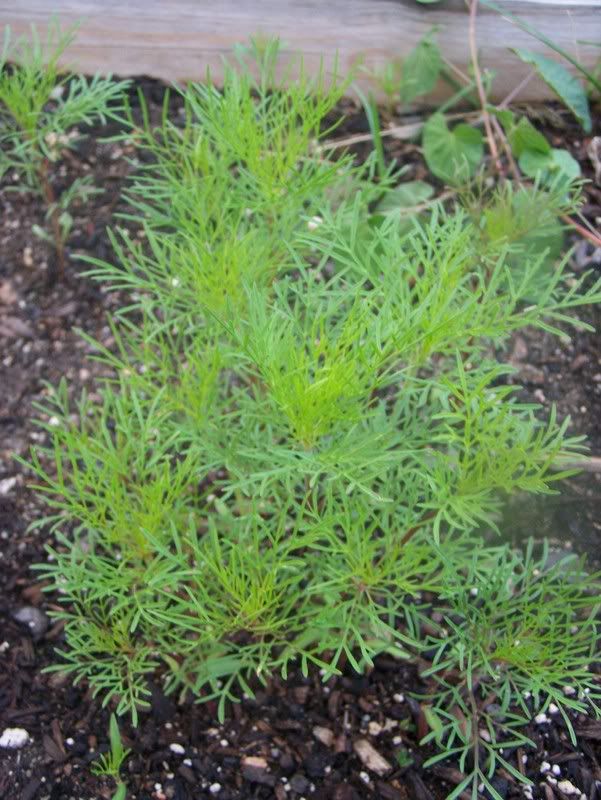
Hmm. Don't know what this is. My guess is dill.


Sorry it's blurry, but this is new growth on one of our lilacs.


Ok, here's what happened. Dabney wants to garden very badly. I found some seed packets from a few years ago in the basement and Dabney was overjoyed. She scattered and hoed and scattered more and watered. To be honest, I didn't expect anything to come up, but check it out! She is happier than a clam.


Not sure about this one either, but I'm really hoping it's a pumpkin plant!

Sunday, August 10, 2008

Friday, August 08, 2008

Sweet Summer Nights

Although my house is quiet, I love nights like this. My babies are safely tucked into their warm beds upstairs, there's a soft breeze blowing through the front window, the stars are starting to peek out of the evening clouds and I'm at the kitchen table making a few alterations for a friend 's bridesmaid's dress with my faithful Singer 4525. I can hear the wind chimes from the front porch. I'm playing my favorite musical in the living room for inspiration~ I think the beautiful Edwardian costumes are my favorite part of the movie. I love the American Edwardian fashions (circa 1910) because they are modest but beautiful and fashionable. Anyway.

My house is quiet. It's not as full as it was yesterday. A little sadder, though, especially for the little one who doesn't take goodbyes very well. We had such a great time with my family~ actually, it's hard to not a have a great time with them. Dabney keeps saying, "I had such a fun time with Grandma and Pop Pop." We'll miss them lots but God is so good to let us see them as often as we do. I never imagined we'd see them so much when they first told me they were moving across the Pacific. I praise God for them and we're so glad they came.

Tuesday, August 05, 2008

Daring Bakers Challenge #8

A day late and a few hazelnuts short!
As always, my comments are in blue.

Filbert Gateau with Praline Buttercream

From Great Cakes by Carol Walter

1 Filbert Genoise
1 recipe sugar syrup, flavored with dark rum
1 recipe Praline Buttercream
½ cup heavy cream, whipped to soft peaks
1 recipe Apricot Glaze
1 recipe Ganache Glaze, prepared just before using
3 tablespoons filberts, toasted and coarsely chopped

Filbert Genoise

Because of the amount of nuts in the recipe, this preparation is different from a classic genoise.

1 ½ cups hazelnuts, toasted/skinned
2/3 cup cake flour, unsifted
2 Tbsp. cornstarch
7 large egg yolks
1 cup sugar, divided ¼ & ¾ cups
1 tsp. vanilla extract
½ tsp. grated lemon rind
5 lg. egg whites
¼ cup warm, clarified butter (100 – 110 degrees)

Ok, I used peanuts instead of hazelnuts because when I sent my sweet husband to the store,he called me from the nut aisle and happened to question, "Do you know that hazelnuts cost $5 for 7 ounces, Honey? And that I don't like hazelnuts..." So we switched to $1.99 peanuts.


Position rack in the lower 3rd of the oven and preheat to 350 degrees. Grease and flour a 10” X 2” inch round cake pan.

Using a food processor, process nuts, cake flour, and cornstarch for about 30 seconds. Then, pulse the mixture about 10 times to get a fine, powdery mixture. You’ll know the nuts are ready when they begin to gather together around the sides of the bowl. While you want to make sure there aren’t any large pieces, don’t over-process. Set aside.

Put the yolks in the bowl of an electric mixer, with the whisk attachment, and beat until thick and light in color, about 3-4 minutes on med-high speed. Slowly, add ¾ cup of sugar. It is best to do so by adding a tablespoon at a time, taking about 3 minutes for this step. When finished, the mixture should be ribbony. Blend in the vanilla and grated lemon rind. Remove and set aside.

Place egg whites in a large, clean bowl of the electric mixer with the whisk attachment and beat on medium speed, until soft peaks. Increase to med-high speed and slowly add the remaining ¼ cup of sugar, over 15-20 seconds or so. Continue to beat for another ½ minute.
Add the yolk mixture to the whites and whisk for 1 minute.

Pour the warm butter in a liquid measure cup (or a spouted container). * It must be a deep bottom bowl and work must be fast.* Put the nut meal in a mesh strainer (or use your hand – working quickly) and sprinkle it in about 2 tablespoons at a time – folding it carefully for about 40 folds. Be sure to exclude any large chunks/pieces of nuts. Again, work quickly and carefully as to not deflate the mixture. When all but about 2 Tbsp. of nut meal remain, quickly and steadily pour the warm butter over the batter. Then, with the remaining nut meal, fold the batter to incorporate, about 13 or so folds.

With a rubber spatula, transfer the batter into the prepared pan, smoothing the surface with the spatula or back of a spoon. **If collected butter remains at the bottom of the bowl, do not add it to the batter! It will impede the cake rising while baking.

Tap the pan on the counter to remove air bubbles and bake in the preheated oven for 30-35 minutes. You’ll know the cake is done when it is springy to the touch and it separates itself from the side of the pan. Remove from oven and allow to stand for 5 minutes. Invert onto a cake rack sprayed with nonstick coating, removing the pan. Cool the cake completely.

*If not using the cake right away, wrap thoroughly in plastic wrap, then in a plastic bag, then in the refrigerator for up to 3 days. If freezing, wrap in foil, then the bag and use within 2-3 months.

Sugar Syrup
Makes 1 cup, good for one 10-inch cake – split into 3 layers

1 cup water
¼ cup sugar
2 Tbsp. dark rum or orange flavored liqueur

In a small, yet heavy saucepan, bring the water and sugar to a boil and simmer for 5 minutes. Remove from heat, add the liqueur. Cool slightly before using on the cake. *Can be made in advance.


Do yourself a favor and put it in a squeeze bottle. It's way fast and more precise and you don't have to use a brush.

Praline Buttercream
1 recipe Swiss Buttercream
1/3 cup praline paste
1 ½ - 2 Tbsp. Jamaican rum (optional)

Blend ½ cup buttercream into the paste, then add to the remaining buttercream. Whip briefly on med-low speed to combine. Blend in rum.

Swiss Buttercream
4 lg. egg whites
¾ cup sugar
1 ½ cups (3 sticks) unsalted butter, slightly firm
1 ½ -2 Tbsp. Grand Marnier or liqueur of your choice
1 tsp. vanilla

Place the egg whites in a lg/ bowl of a elevtric mixer and beat with the whisk attachment until the whites are foamy and they begin to thicken (just before the soft peak stage). Set the bowl over a saucepan filled with about 2 inches of simmering water, making sure the bowl is not touching the water. Then, whisk in the sugar by adding 1-2 tablespoon of sugar at a time over a minutes time. Continue beating 2-3 minutes or until the whites are warm (about 120 degrees) and the sugar is dissolved. The mixture should look thick and like whipped marshmallows.
Remove from pan and with either the paddle or whisk attachment, beat the egg whites and sugar on med-high until its a thick, cool meringue – about 5-7 minutes. *Do not overbeat*. Set aside.

Place the butter in a separate clean mixing bowl and, using the paddle attachment, cream the butter at medium speed for 40-60 seconds, or until smooth and creamy. *Do not overbeat or the butter will become toooooo soft.*

On med-low speed, blend the meringue into the butter, about 1-2 Tbsp. at a time, over 1 minute. Add the liqueur and vanilla and mix for 30-45 seconds longer, until thick and creamy.

Refrigerate 10-15 minutes before using.

Wait! My buttercream won’t come together! Reheat the buttercream briefly over simmering water for about 5 seconds, stirring with a wooden spoon. Be careful and do not overbeat. The mixture will look broken with some liquid at the bottom of the bowl. Return the bowl to the mixer and whip on medium speed just until the cream comes back together.

Wait! My buttercream is too soft! Chill the buttercream in the refrigerator for about 10 minutes and rewhip. If that doesn’t work, cream an additional 2-4 Tbsp. of butter in a small bowl– making sure the butter is not as soft as the original amount, so make sure is cool and smooth. On low speed, quickly add the creamed butter to the buttercream, 1 Tbsp. at a time.

Refrigerate in an airtight container for up to 5 days, or can be frozen for up to 6 months. If freezing, store in 2 16-oz. plastic containers and thaw in the refrigerator overnight or at room temperature for several hours.


Praline Paste
1 cup (4 ½ oz.) Hazelnuts, toasted/skinless
2/3 cup Sugar
Line a jelly roll pan with parchment and lightly butter.

Put the sugar in a heavy 10-inch skillet. Heat on low flame for about 10-20 min until the sugar melts around the edges. Do not stir the sugar. Swirl the pan if necessary to prevent the melted sugar from burning. Brush the sides of the pan with water to remove sugar crystals. If the sugar in the center does not melt, stir briefly. When the sugar is completely melted and caramel in color, remove from heat. Stir in the nuts with a wooden spoon and separate the clusters. Return to low heat and stir to coat the nuts on all sides. Cook until the mixture starts to bubble. **Remember – extremely hot mixture.** Then onto the parchment lined sheet and spread as evenly as possible. As it cools, it will harden into brittle. Break the candied nuts into pieces and place them in the food processor. Pulse into a medium-fine crunch or process until the brittle turns into a powder. To make paste, process for several minutes. Store in an airtight container and store in a cook dry place. Do not refrigerate.

Apricot Glaze
Good for one 10-inch cake

2/3 cup thick apricot preserves
1 Tbsp. water

In a small, yet heavy saucepan, bring the water and preserves to a slow boil and simmer for 2-3 minutes. If the mixture begins to stick to the bottom of the saucepan, add water as needed.

Remove from heat and, using a strainer, press the mixture through the mesh and discard any remnants. With a pastry brush, apply the glaze onto the cake while the cake is still warm. If the glaze is too thick, thin to a preferred consistency with drops of water.
I didn't do this. Well, I sort of did. I boiled the preserves and brushed it on the top but I didn't strain it and I didn't brush it on the sides.

Ganache Glaze
Makes about 1 cup, enough to cover the top and sides of a 9 or 10 inch layer or tube cake

**Ganache can take on many forms. While warm – great fudge sauce. While cool or lukewarm – semisweet glaze. Slightly chilled – can be whipped into a filling/frosting. Cold & solid – the base of candied chocolate truffles.

6 oz. (good) semisweet or bittersweet chocolate, like Lindt
6 oz. (¾ cup heavy cream
1 tbsp. light corn syrup
1 Tbsp. Grand Marnier, Cointreay, or dark Jamaican rum (optional)
¾ tsp. vanilla
½ - 1 tsp. hot water, if needed

Blend vanilla and liqueur/rum together and set aside.

Break the chocolate into 1-inch pieces and place in the basket of a food processor and pulse until finely chopped. Transfer into a medium sized bowl and set aside.

Heat the cream and corn syrup in a saucepan, on low, until it reached a gentle boil. Once to the gently boil, immediately and carefully pour over the chocolate. Leave it alone for one minute, then slowly stir and mix the chocolate and cream together until the chocolate is melted and incorporated into the cream. Carefully blend in vanilla mixture. If the surface seems oily, add ½ - 1 tsp hot water. The glaze will thicken, but should still be pourable. If it doesn’t thicken, refrigerate for about 5 minutes, but make sure it doesn’t get too cold!


Assembling Cake

Cut a cardboard disk slightly smaller than the cake. Divide the cake into 3 layers and place the first layer top-side down on the disk. Using a pastry brush, moisten the layer with 3-4 Tbsp. of warm sugar syrup. Measure out 1 cup of praline buttercream and set aside.

Spread the bottom layer with a ¼-inch thickness of the remaining buttercream. Cover with ½ of the whipped cream, leaving ¼-inch border around the edge of the cake. Place the middle layer over the first, brush with sugar syrup, spreading with buttercream. Cover with the remaining whipped cream.

Moisten the cut side of the third layer with additional sugar syrup and place cut side down on the cake. Gently, press the sides of the cake to align the layers. Refrigerate to chill for at least 30 minutes.

Lift the cake by sliding your palm under the cardboard. Holding a serrated or very sharp night with an 8-ich blade held parallel to the sides of the cake, trim the sides so that they are perfectly straight. Cut a slight bevel at the top to help the glaze drip over the edge. Brush the top and sides of the cake with warm apricot glaze, sealing the cut areas completely. Chill while you prepare the ganache.

Place a rack over a large shallow pan to catch the ganache drippings. Remove the gateau from the refrigerator and put it the rack. With a metal spatula in hand, and holding the saucepan about 10 inches above the cake, pour the ganache onto the cake’s center. Move the spatula over the top of the ganache about 4 times to get a smooth and mirror-like appearance. The ganache should cover the top and run down the sides of the cake. When the ganache has been poured and is coating the cake, lift one side of the rack and bang it once on the counter to help spread the ganache evenly and break any air bubbles. (Work fast before setting starts.) Patch any bare spots on the sides with a smaller spatula, but do not touch the top after the “bang”. Let the cake stand at least 15 minutes to set after glazing.

To garnish the cake, fit a 12 – 14-inch pastry bag with a #114 large leaf tip. Fill the bag with the reserved praline cream. Stating ½ inch from the outer edge of the cake, position the pastry tube at a 90 degree angle with the top almost touching the top of the cake. Apply pressure to the pastry bag, moving it slightly toward the center of the cake. As the buttercream flows on the cake, reverse the movement backward toward the edge of the cake and finish by pulling the bag again to the center. Stop applying pressure and press the bag downward, then quickly pull the tip up to break the flow of frosting. Repeat, making 12 leaves evenly spaced around the surface of the cake.
I didn't grind the nuts as finely as I should have, so the buttercream didn't pipe like it should have (the nuts were too big) so I used a bigger star tips and just made rosettes.

Make a second row of leaves on the top of the first row, moving the pastry bag about ¾ inch closer to the center. The leaves should overlap. Make a 3rd row, moving closer and closer to the center. Add a 4th row if you have the room. But, leave a 2-inch space in the center for a chopped filbert garnish. Refrigerate uncovered for 3-4 hours to allow the cake to set. Remove the cake from the refrigerator at least 3 hours before serving.

Leftover cake can be covered with foil and kept in the refrigerator for up to 5 days.


Related Posts Plugin for WordPress, Blogger...